Step-by-step pairing
Inspect system & SIM status
Sign in to the Dinstar admin interface and verify SIM registration, RSSI signal levels, port status, ASR and ACD on the System information screen.
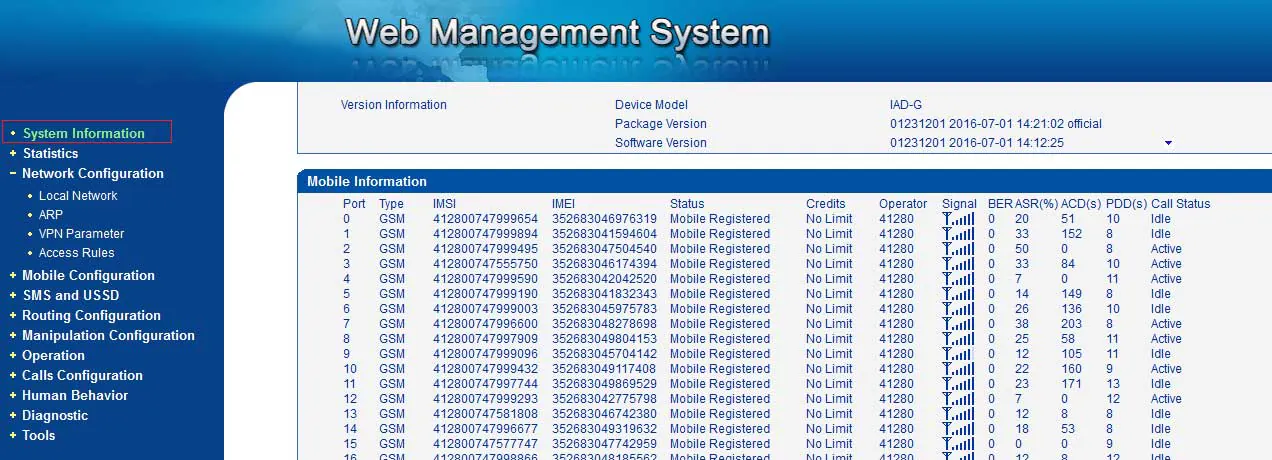
Figure 1 · Dinstar system information Configure local network IP
Set a static LAN IP in the Cloudfonica client range with default gateway
192.168.101.1and subnet mask255.255.255.0.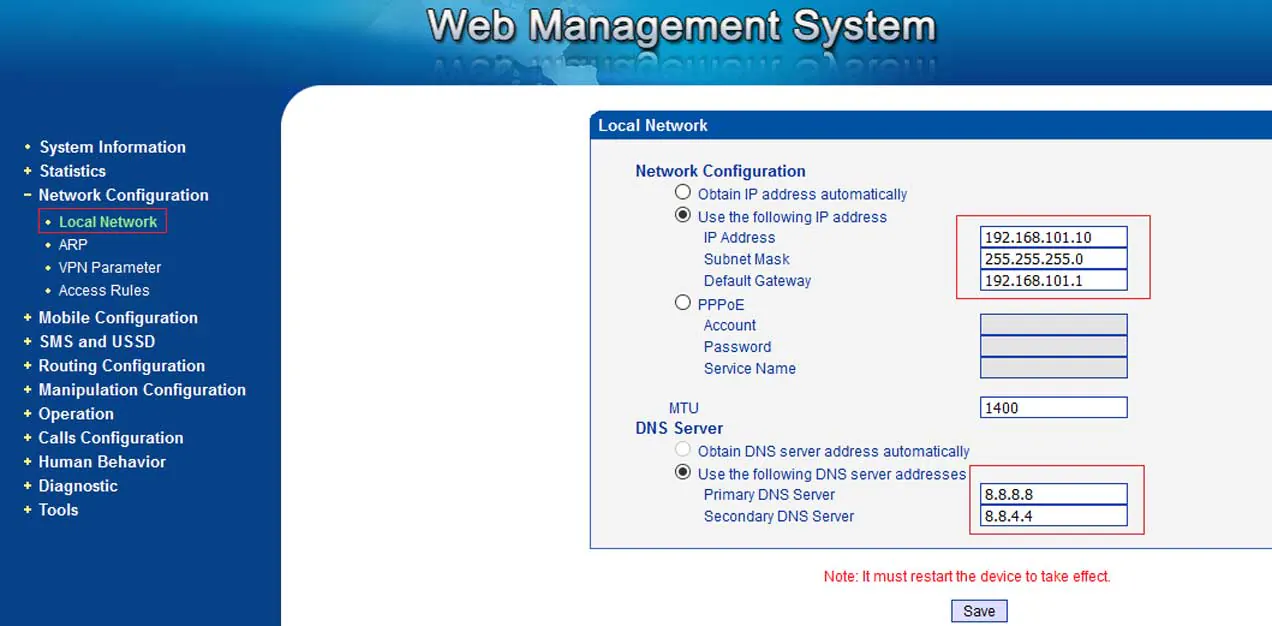
Figure 2 · Dinstar local network configuration Set routing order before manipulation
Under Routing configuration → Routing parameters, set both IP → Tel and Tel → IP order to Route calls before manipulation.
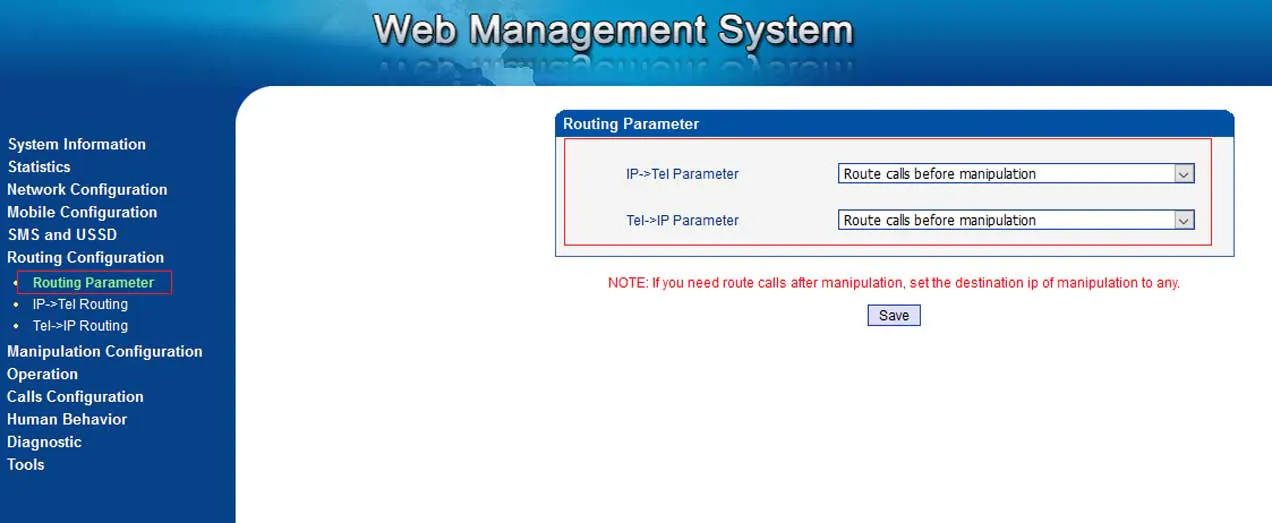
Figure 3 · Routing parameters Create IP → Tel routing rule
Add an IP → Tel routing entry forwarding inbound traffic from the Cloudfonica trunk to your active mobile port group.
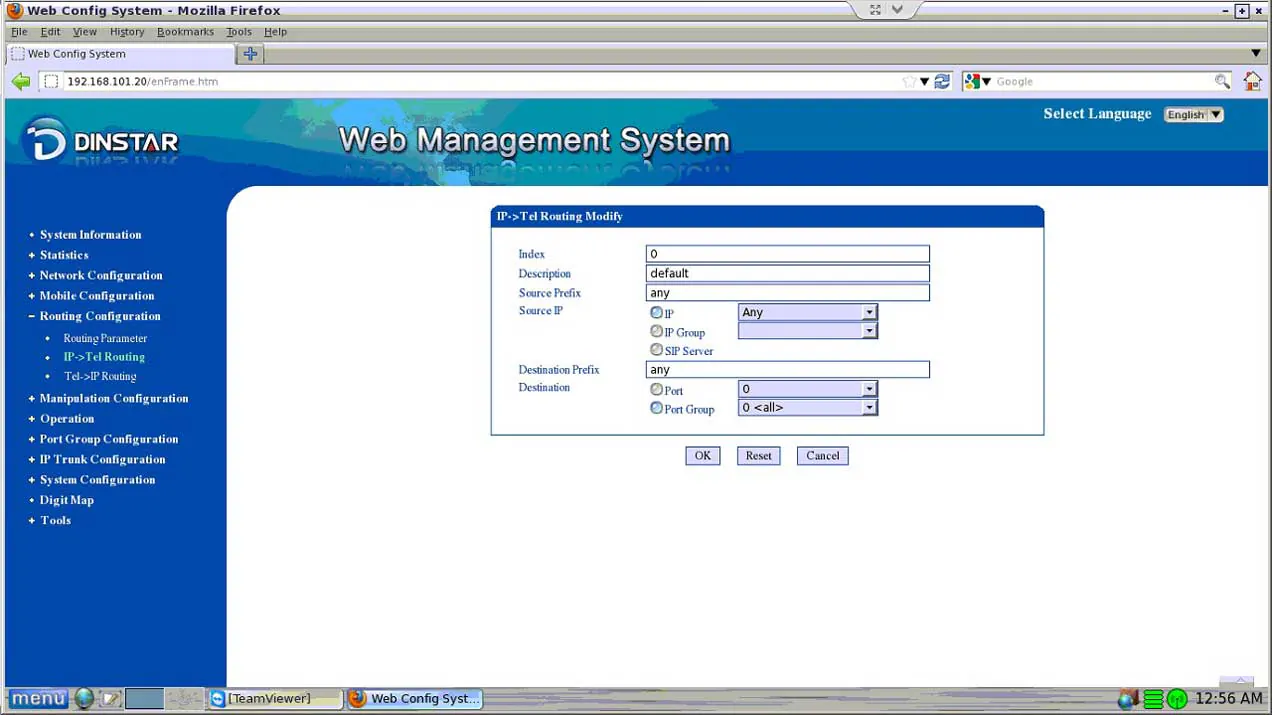
Figure 4 · IP → Tel routing configuration Configure IP → Tel destination manipulation
Under Manipulation configuration, map inbound prefixes and ports cleanly to match your dialled number format.
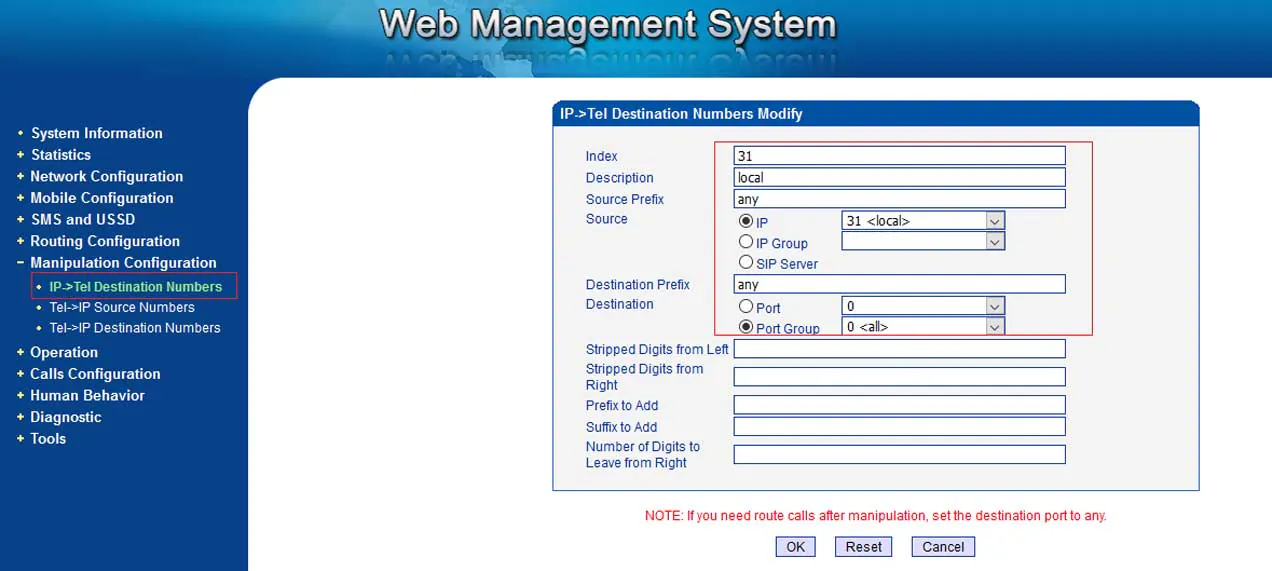
Figure 5 · Dinstar manipulation configuration Allow inbound operation rules
In Operation configuration, permit call origination from the Cloudfonica client IP to terminate onto Dinstar GSM channels.
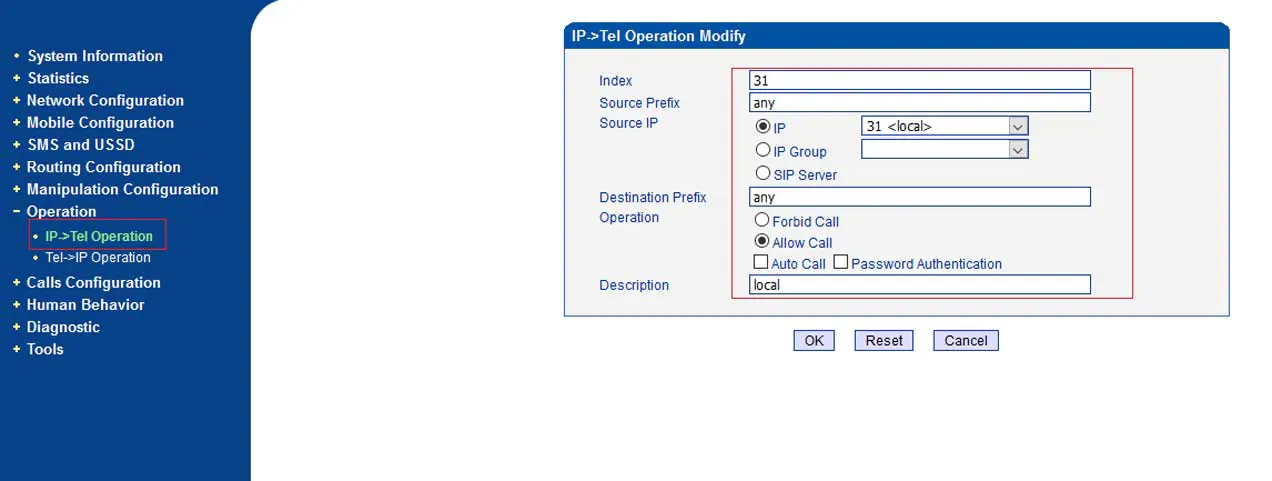
Figure 6 · Dinstar operation configuration Set port group selection to cyclic ascending
Under Port group configuration, enable your active SIM ports and set selection mode to
Cyclic ascendingfor balanced wear across SIMs.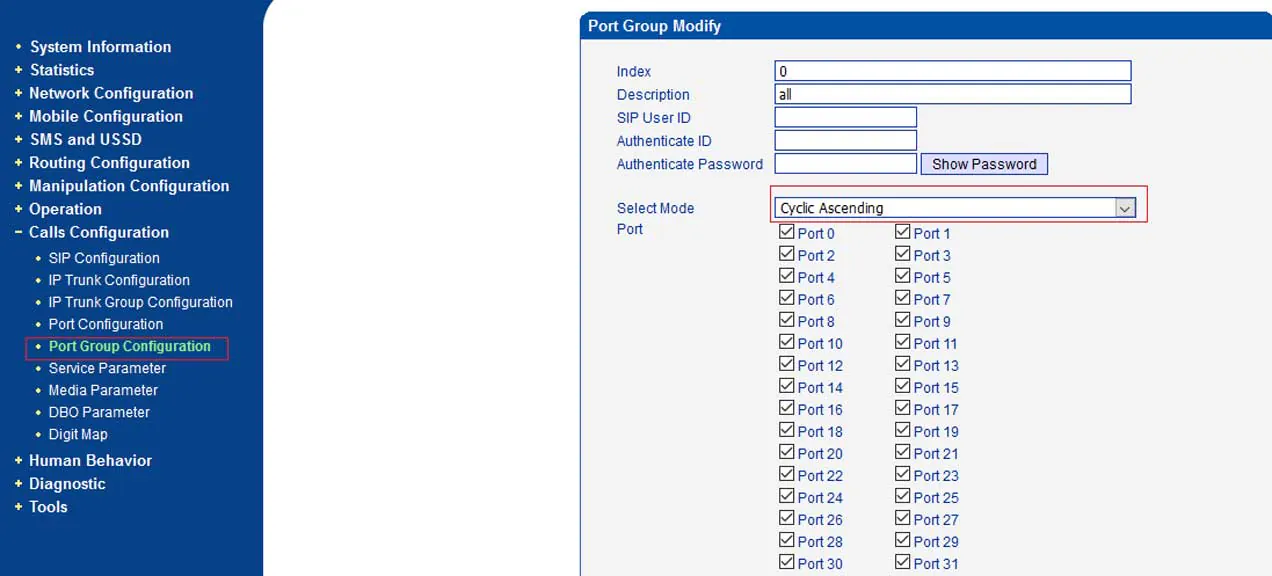
Figure 7 · Port group configuration Add IP trunk (192.168.101.1:5060)
Under IP trunk configuration, enter your Cloudfonica client IP (
192.168.101.1) and remote SIP port5060.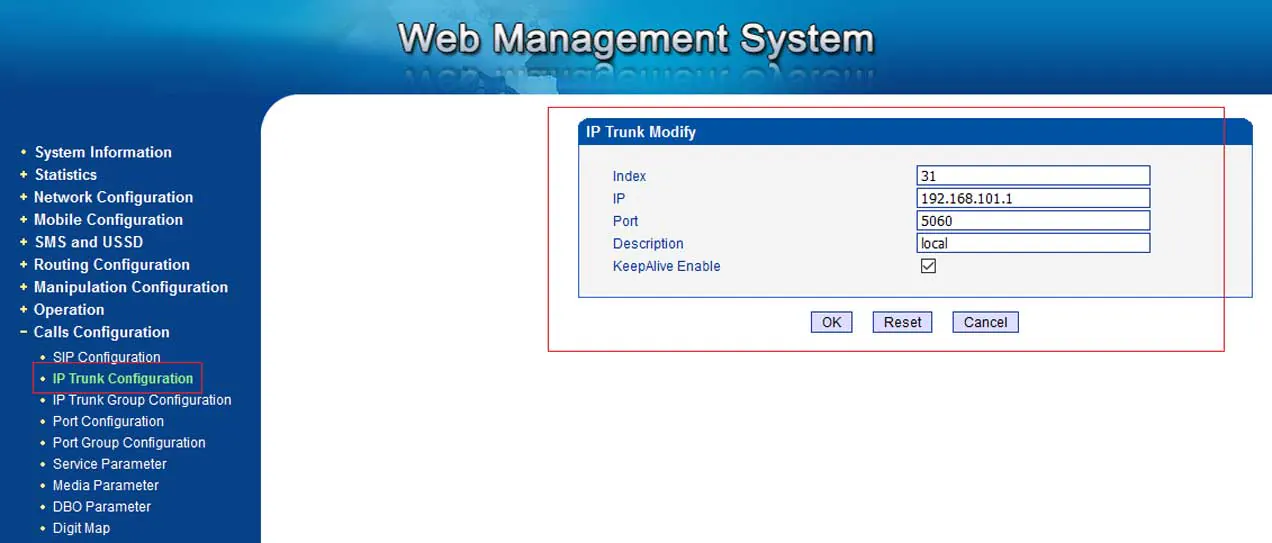
Figure 8 · IP trunk configuration Select voice codecs
In Service parameter configuration, enable
G.729andG.723(with optionalA-law / μ-lawfallback).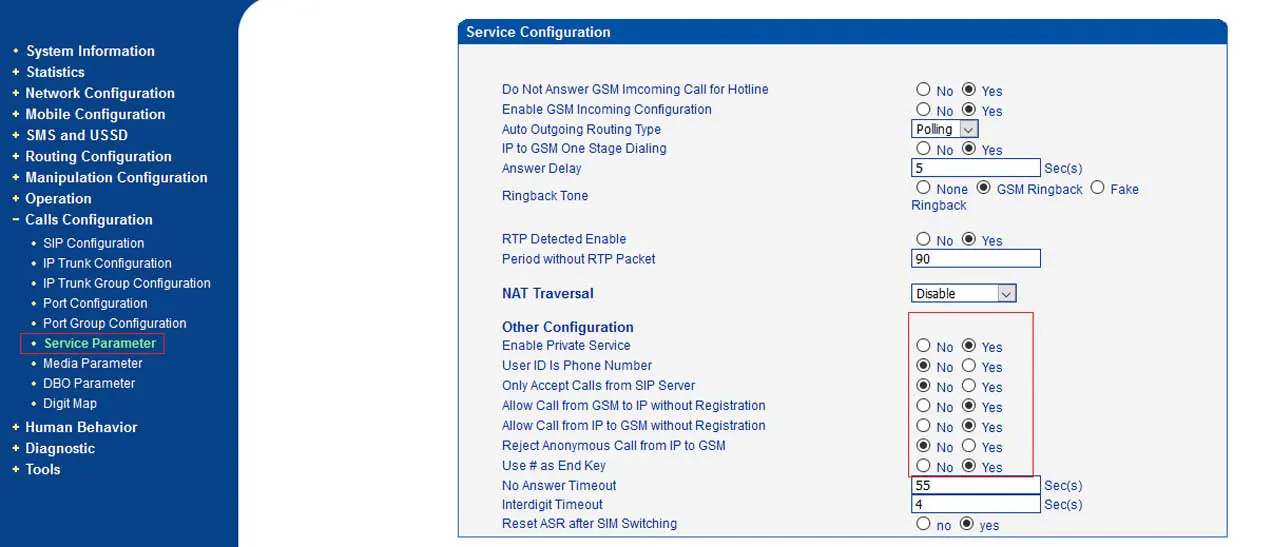
Figure 9 · Service parameter configuration Bind SIP server parameter & reboot
Confirm your default SIP server pairing under SIP parameter configuration, save settings and add the gateway’s static IP to your Cloudfonica panel.
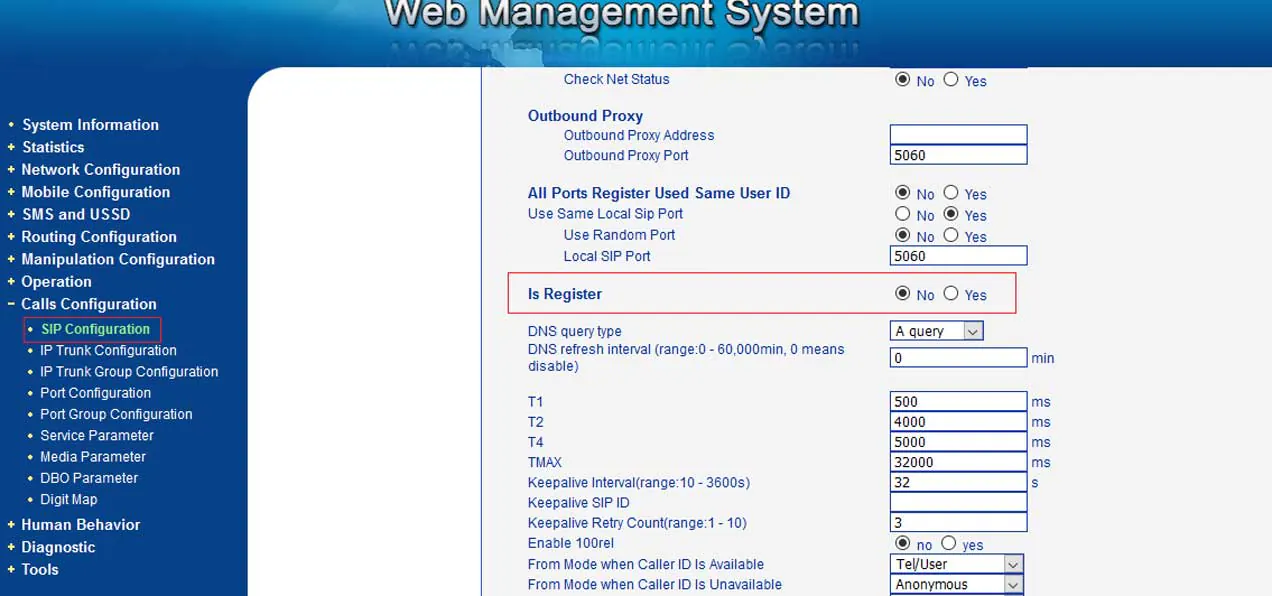
Figure 10 · SIP parameter configuration
Illustrated PDF manual
Dinstar gateway configuration guide
Ten-step illustrated manual for local network IP, IP↔Tel routing, cyclic ascending port groups and SIP port 5060.
SHA-256: 6f230b905773…7d1305fe